Another of Marie Niemann’s Flea Market Gardening projects…from ‘morning post’ to full tutorial
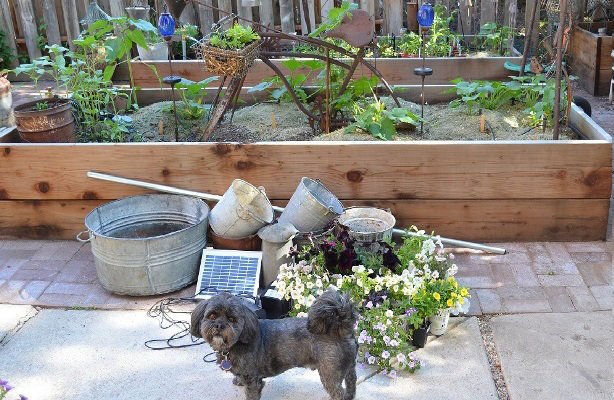
Marie Niemann tells us, “Remember a while back when I teased you with some assorted parts for my next project? It’s a solar water fountain with galvanized tipsy pots. I finally finished it! Inspired by my good friend and Flea Market Gardening contributor and artist Annie Grossart-Steen with her tipsy galvanized water feature.
“I don’t have a pond, so I used a large old washtub as my reservoir, and anchored the tipsy pots on a piece of conduit pounded into the ground. I’m pleased with how it turned out, especially since I did most of it by myself! Oh and another old funnel this time on a pole! The floaters in the tub are pumice stones found in the desert! Kewl Beans!”
Marie’s newest project has created a sensation! Marie says, “This is an oil can and I had an old watering can brass head I bought a while back and it was perfect to slow the flow of the fountain and sounds much better. I didn’t glue it in since I’m sure it’ll get to where it needs to be cleaned out. Solar pump is awesome!”
SUPPLIES NEEDED
TOOLS NEEDED
Drill
Hacksaw
Largest bit you have! Or a 1 1/4” hole saw bit 1/8” bit
Hammer
Metal Chisel
Needle nose pliers
Screwdriver
Gloves
“Check your reservoir for leaks and clean all of the containers and buckets thoroughly to remove any oil or chemicals.”
“If you have leaks in your reservoir tub then seal it with GE Silicon II sealant and let dry overnight.”
“Next drill a hole in the center of each old bucket including your top watering can so they each string on the conduit pole one by one. I didn’t have a very large bit, so used the largest I could fine in the tool box. Drill a pilot hole with a smaller bit first then use the bigger one. Since my hole was too small I went after it with a hammer and metal chisel to widen it out. It’s not pretty, but it works! Notice it wasn’t in the center of my watering can? Both my husband and I assumed if I put the hole closest to the spout it would give it more tip. Nope! So.. I had to make the hole even larger towards the center of the can. Doesn’t matter, it won’t be seen. Wear gloves! This old metal is sharp! Check to see if your holes are large enough for the pipe to slide easily through each one.”
“Then using your 1/8” bit drill numerous holes on one edge of each bucket for drainage. Next pound your pipe into the ground until it’s secure enough to hold the weight of the planted buckets. You don’t want a tipsy pole!”
“Slide your first bucket over the pipe all the way to the ground, use your largest bucket for this one if you have one. If you are going to run your hose up through the pipe then you’ll need to cut a hole large enough for the hose and an elbow to fit so the hose won’t get damaged or kink. (See below for an alternative solution) Make your cut just above your ground level pot. Be careful and wear gloves because it’s sharp!”
“Slide your first bucket over the pipe all the way to the ground, use your largest bucket for this one if you have one. If you are going to run your hose up through the pipe then you’ll need to cut a hole large enough for the hose and an elbow to fit so the hose won’t get damaged or kink. (*See below for an alternative solution) Make your cut just above your ground level pot. Be careful and wear gloves because it’s sharp!”
“Slide a hose clamp down to where you want your first tipsy bucket and tighten. Slide a bucket down to where it stops on top of the hose clamp and tip it to one side. (be sure the tipped edge has the drainage holes at the lowest point) Then continue sliding a hose clamp and a bucket until you have all of them you want in place alternating tipping directions. They can rest on top of one another, but be sure to use a clamp to help support the weight.”
“Now would be the time to adjust your pots and check to make sure each one has the drainage holes facing the correct direction. If the pipe needs to be cut do so leaving about 6” above the top bucket using the hacksaw, or a sawsall if you own one. Get help if you need it.”
Garden Sun Light APP012B 3 Watt Solar Panel with Water Pump Battery LED available from Amazon
“Slide your flexible tubing down through the pipe and pull it out at the bottom hole you cut with needle nose pliers and secure it to the elbow. Cut the tubing off at the top leaving about a foot above the metal conduit pipe. Use the shorter piece to hook to the other end of the elbow. Set your reservoir container next to the tipsy pots. Run your tubing over to the edge of the reservoir and cut it and insert another elbow. Turn the elbow facing down over the edge of your reservoir and hook a shorter piece from there to your pump. Then fill your reservoir with water and hook up your solar pump as directed.”
“Now comes the fun part!! Turn it on and test to make sure there are no leaks in your fittings and that the water is pumped out the top. Mine has several pump speeds and I had to use a higher speed to pump the water that high. OK, hopefully by now you are excited that you have flowing water!! Shut it off, and slide your watering can over the pipe and the end of the flexible tube, push the tubing into the spout of the watering can and tip it over in the direction of your reservoir. That’s it! Now fix yourself a nice cold drink and sit down to admire your work! Then plant your tipsy buckets with your favorite flowers.”
“I’ve always called it my Happy Garden,” Marie says, ” and love filling it with my favorite treasures and rocks. And now with my fountain up and running I love it even more, and as you can imagine, it sounds so wonderful! As you can tell, it’s not much real estate to work with… so I have to go vertical!”
*TIP: If you don’t want to run your tubing through the pipe, you can easily run it up behind the buckets to the watering can and save yourself some work. Also, if you can’t find old galvanized buckets you can use new ones and make them age quickly (before you plant) with vinegar, salt and hydrogen peroxide sprayed on them for several days. Or for those of you that like some bling you could paint them!
Enjoy! ~~ Marie
Grow, Grow, Grow, Your Boat... These boat gardens are beautiful, colorful, and well grown. It looks like a lot of… Read More
'Paint' Your Garden with Blue... Is your garden is singing the blues? Mix recycled containers and crafts with blue flowers… Read More
See this hilarious and sometimes poignant list of lost items in the garden Question.......what was the last thing you lost… Read More
Designing a charming garden baker's rack When I first saw Jeanne’s well-arranged and simply delightful Baker’s rack, I thought, ‘Somebody… Read More
Choosing a color from 'Over the Rainbow Garden' Billie Hayman's garden is full of color and she shows how one… Read More
Alliums are drama queens in the garden! Whether real flowers, grown from bulbs or the crafted faux flowers modeled after… Read More